Purchase orders for raw materials
Generate purchase orders for your raw materials using the Material Manager Shopify app
Material Manager enables you to generate purchase orders for your raw materials, making it easier to restock and manage your inventory. This feature is particularly useful for keeping track of all incoming inventory and ensuring you have the necessary materials on hand.
By leveraging historical sales data, Material Manager can automatically identify products that need to be restocked and determine the appropriate quantities for the purchase order.
Create a purchase order
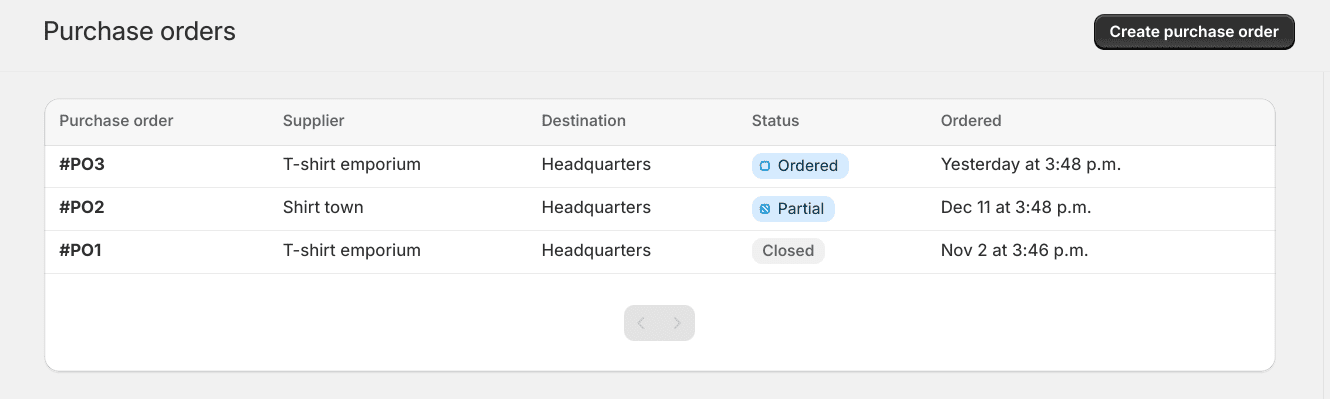
The main purchase order page will show a list of all your purchase orders. To create a new purchase order, click on the “Create purchase order” button in the top right.
This will bring you to the form to create a new purchase order, which contains multiple sections explained below.
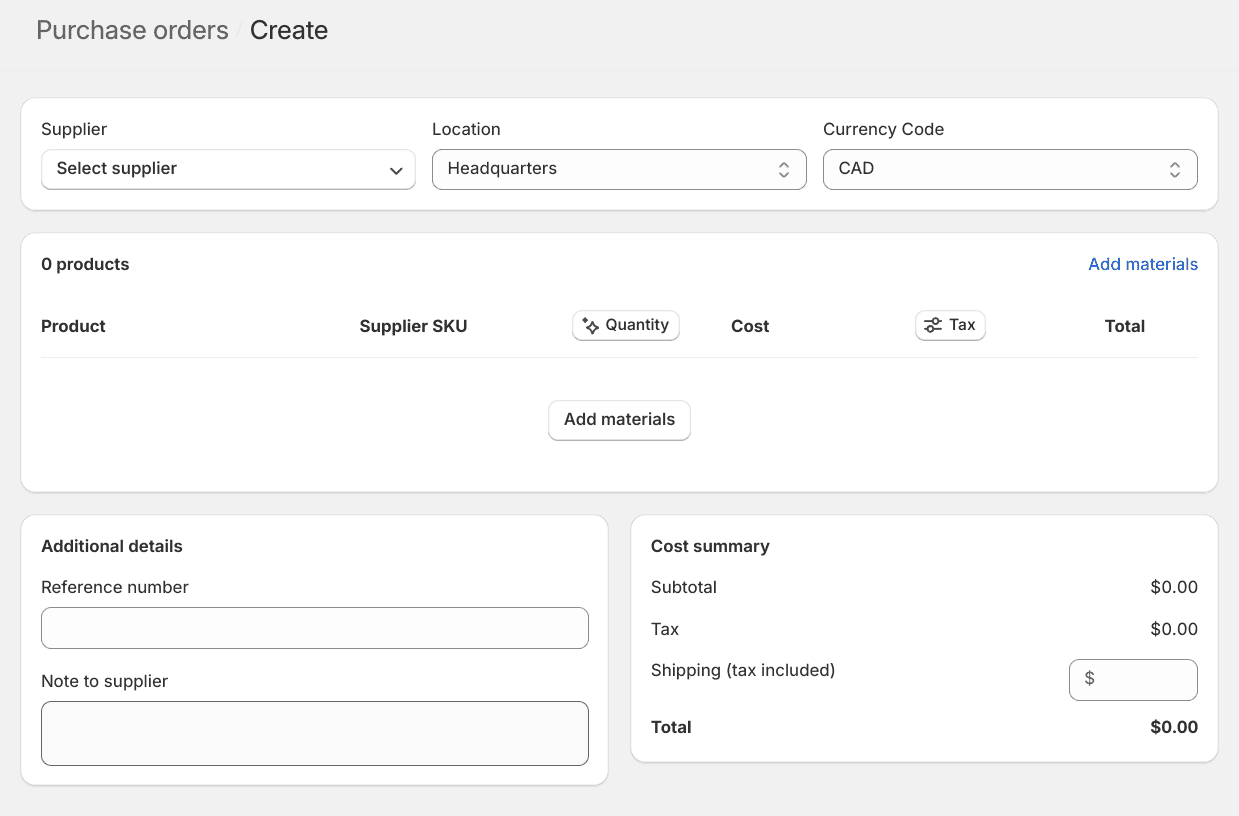
Supplier (optional)
Select an existing supplier from the dropdown or create a new one by clicking the “Create new supplier” button. If a supplier is set, their name and information will be included in the purchase order. When adding materials to the purchase order, the filter will also default to this supplier.
Location
Which of your Shopify locations will receive the inventory for this order. This cannot be changed once the purchase order has been marked as receiving any inventory.
Currency code
The currency code for the materials being purchased.
Adding materials to the purchase order
Clicking on the “Add materials” button will open a modal that will allow you to easily find the materials for the purchase order. You can search for materials by name, filter by supplier, or search by a couple of inventory options. The below screenshot shows filtering by supplier and days of remaining inventory:
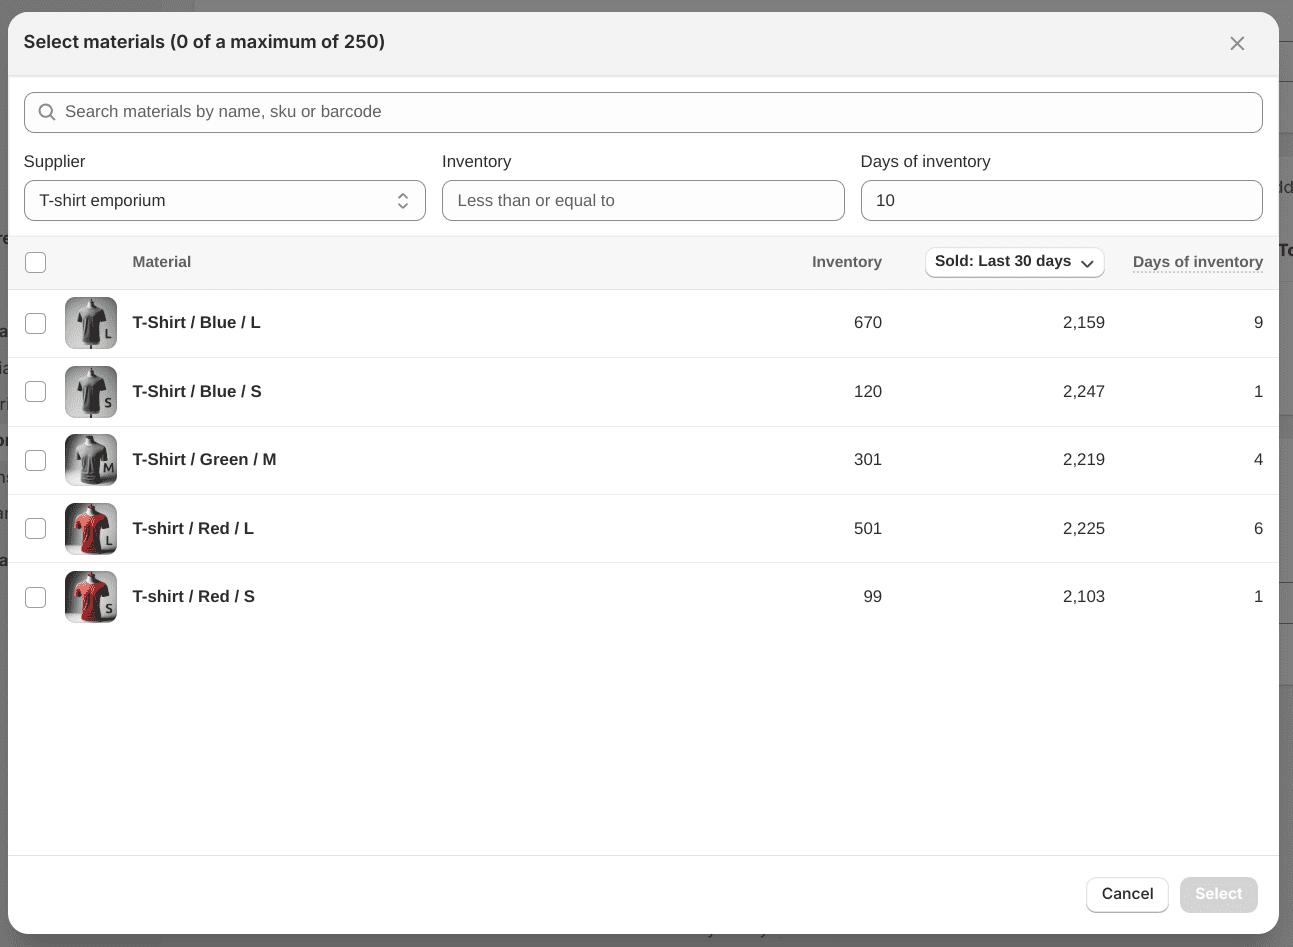
Below is a description of how each filter works:
Search bar
Search for materials by name, SKU, or barcode.
Supplier
Only show materials that belong to the specific supplier. This will default to the supplier set on the purchase order but can be changed or removed if needed.
Inventory
Search for materials that have an inventory level below a certain amount. This can be useful for finding materials that are running low.
Days of inventory
Search for materials that have less than a certain number of estimated days of inventory remaining. This is calculated using the current inventory levels and the average sales per day over the last 30 days by default. The date range used to calculate sales data can be changed by clicking on the column header.
Selecting materials
Use the checkbox next to each material to select them. Or select all materials by clicking the checkbox in the header. Once all materials are selected, click on the select button to add them to the purchase order.
Editing the material line items
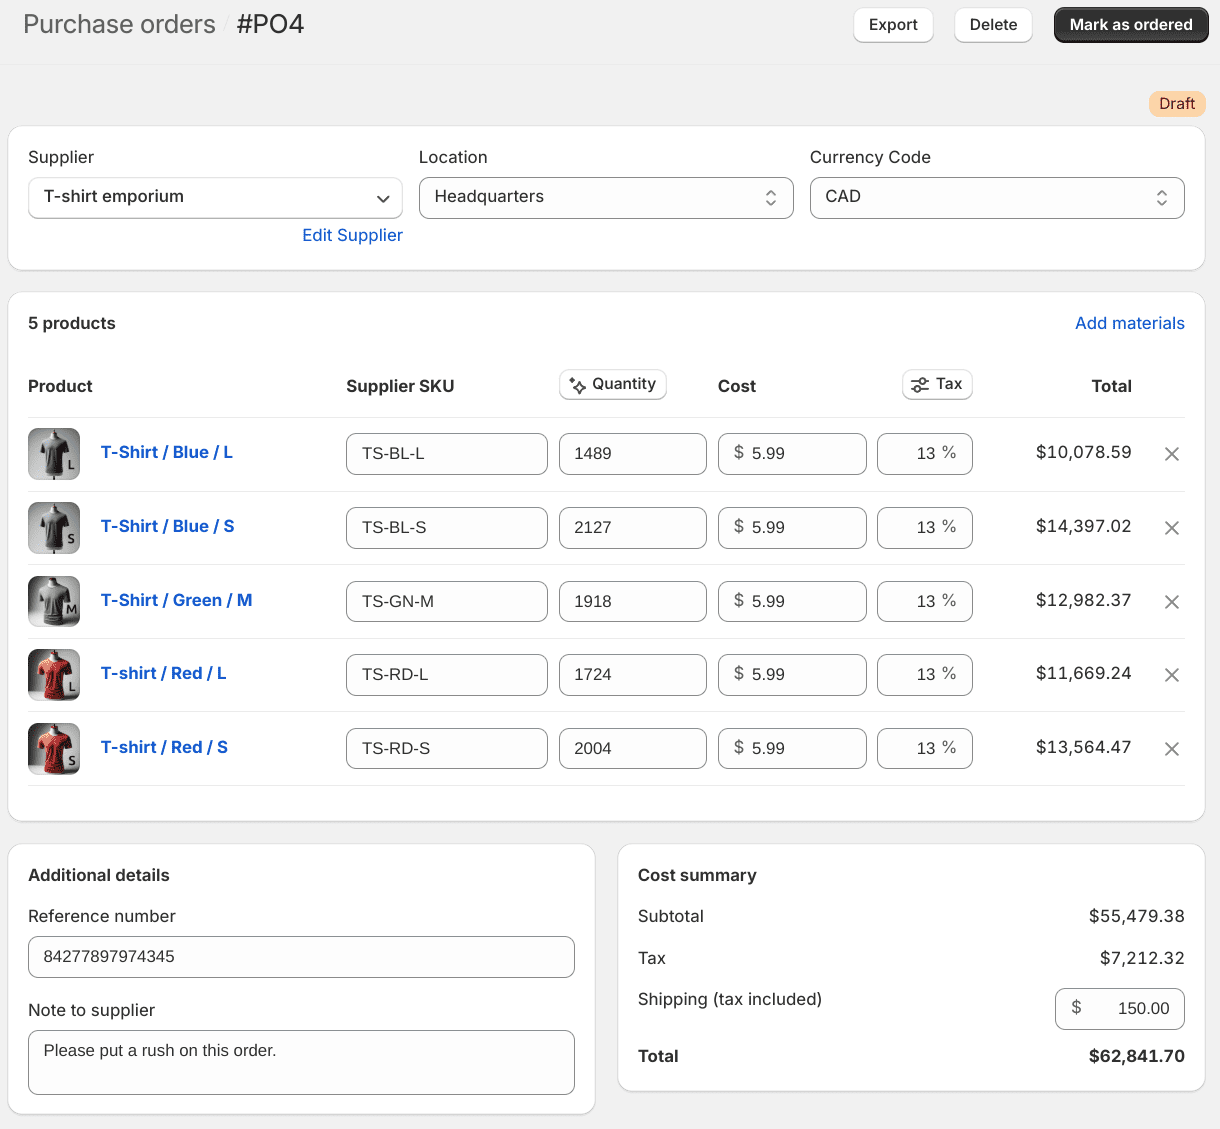
The materials section of the purchase order will now look like the following, various elements of each line item can be edited.
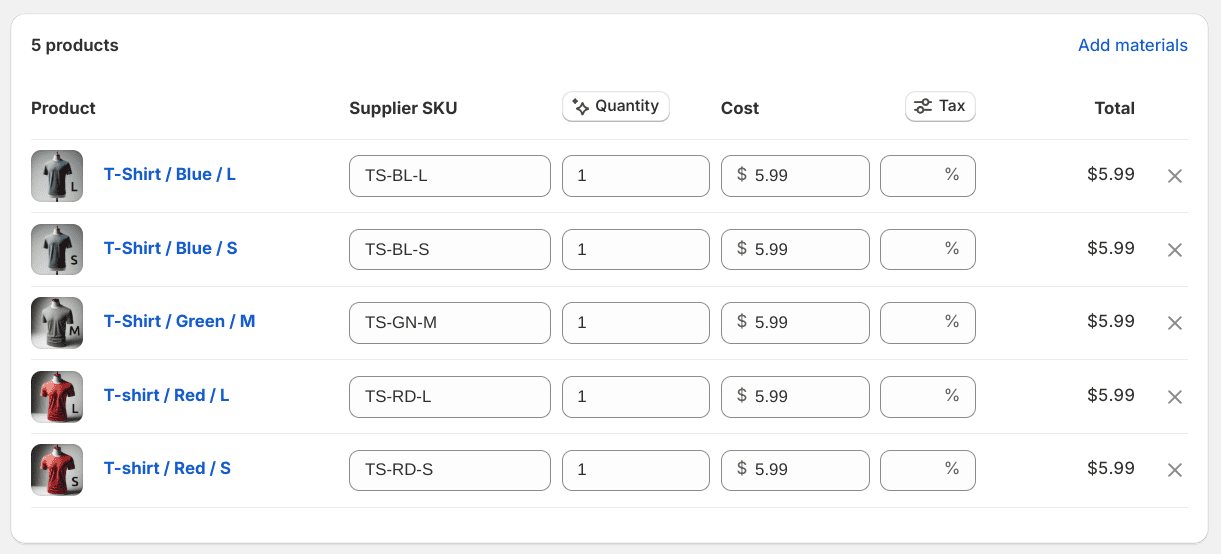
Product
The name of the material, clicking on it will bring you to the material page.
Supplier SKU
The supplier’s SKU for the material. This will default to the material SKU if set but can be changed.
Quantity
This will default to 1 but can be edited to the appropriate amount. Clicking on the column header will also allow you to automatically generate the quantity needed for a certain amount of days based on historical sales data.
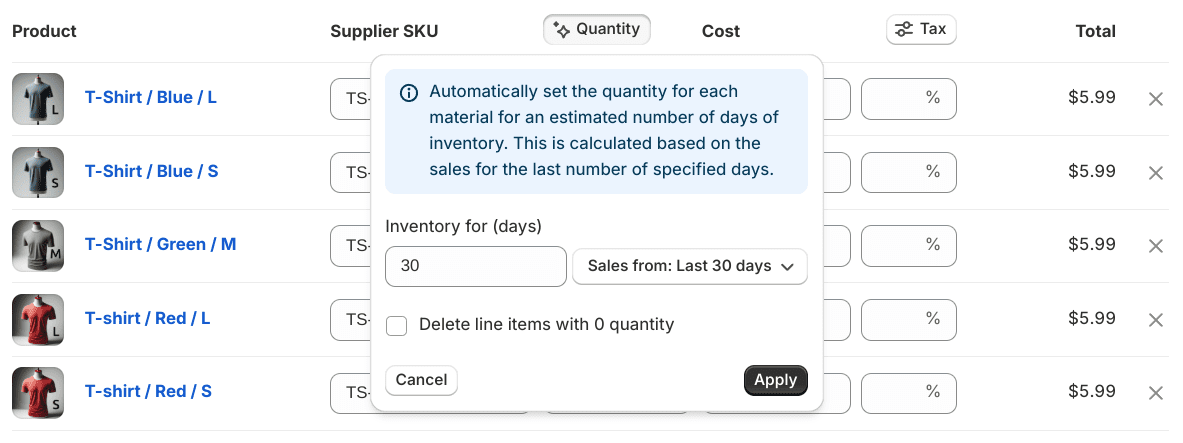
Fill in the number of days you want to restock for and the historical date range of sales data to be used to calculate the quantity. If the “Delete line items with 0 quantity” option is selected, it will automatically remove line items that already have enough inventory for the set amount of days.
Cost
Your cost to purchase the material. This will default to the material cost if set but can be changed.
Tax
The tax rate for the line item. To set the same tax rate for every item, click on the column header.
Additional details section
Reference number
This can be any value, useful to track a reference number shared between you and your supplier.
Note to supplier
Any additional information you want to include on the purchase order.
Cost summary
This section will show all costs for the purchase order, including subtotal, tax, and total. It also allows you to add a shipping cost if necessary (this value should include tax).
Saving the purchase order
Use the save button to save the purchase order. This will create the purchase order in a draft state where you can continue to work on it.
Draft purchase order
After saving a new purchase order, it goes into the “draft” state. Here you can continue to edit the order details and add/remove materials from it. You can also click on the export button to download a CSV of the order details that can be used to send to the supplier.
Once the order has been sent to the supplier, mark the purchase order as “ordered” by clicking the “Mark as ordered” button in the top right.
Receiving inventory
Purchase orders that have entered the ordered status are now ready to receive the incoming inventory and will look like the following screenshot.
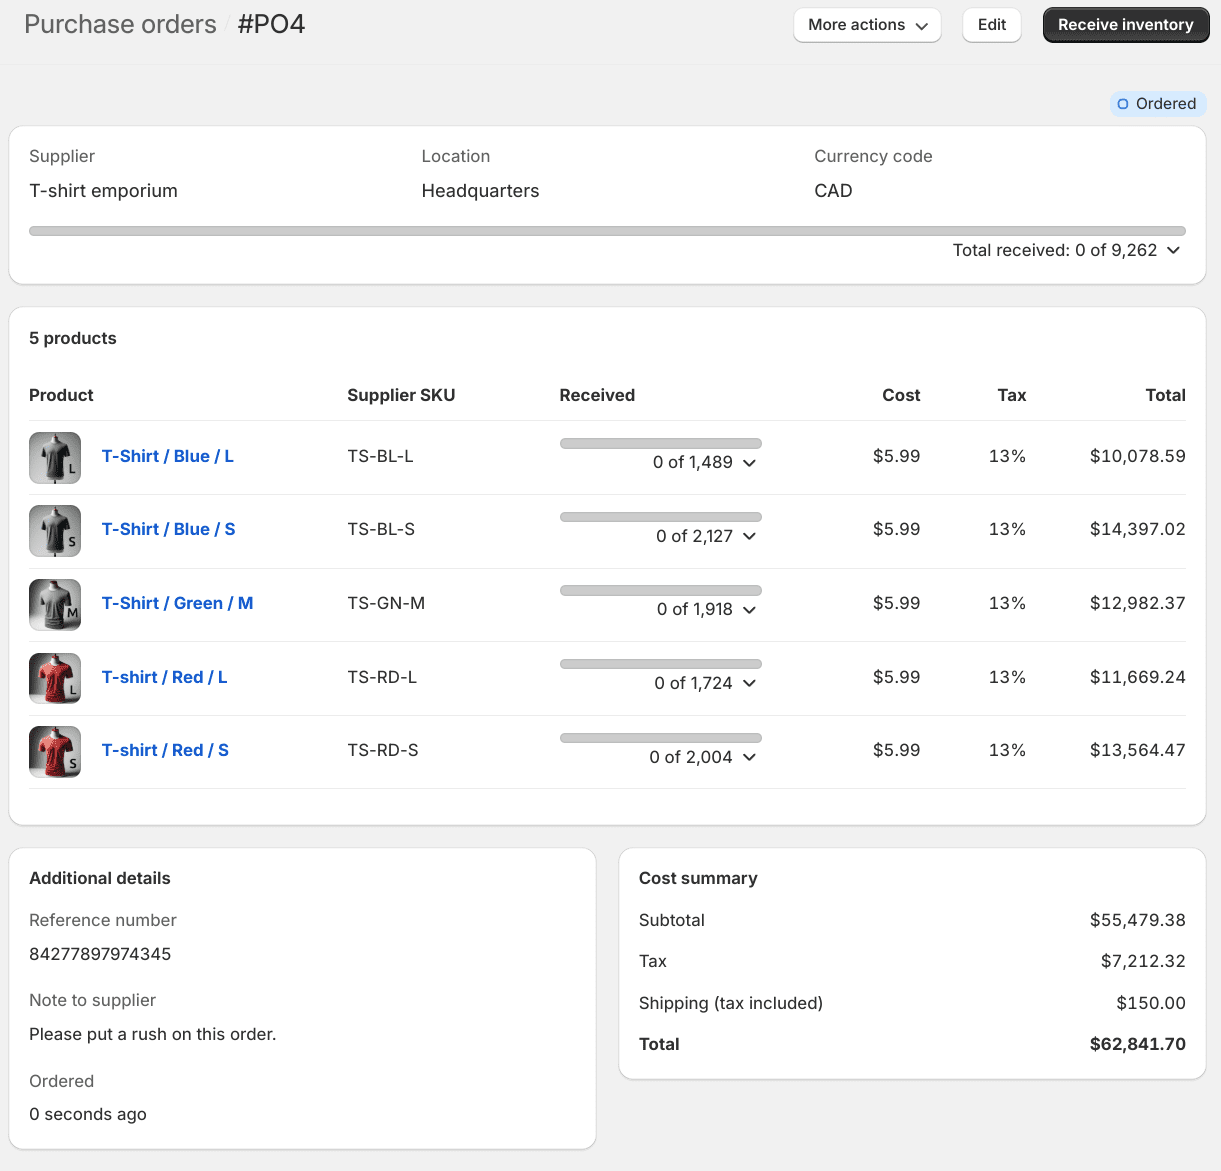
To receive inventory, click on the “Receive inventory” button in the top right. This will open a form allowing you to set how much inventory for each material has been received.

When receiving the inventory, you can set a quantity for how much of each material is accepted or rejected. If a material is accepted, it will be added to the inventory for the location set on the purchase order. If a material is rejected, it will not be added to the inventory.
To quickly accept or reject all remaining inventory, click on the “Accept all unreceived” or “Reject all unreceived” buttons.
Closing a purchase order
Once all work associated with a purchase order is complete, you can set it to “closed” by clicking on “More action -> Close purchase order” in the top right. A purchase order can be closed even if all the inventory has not been received.
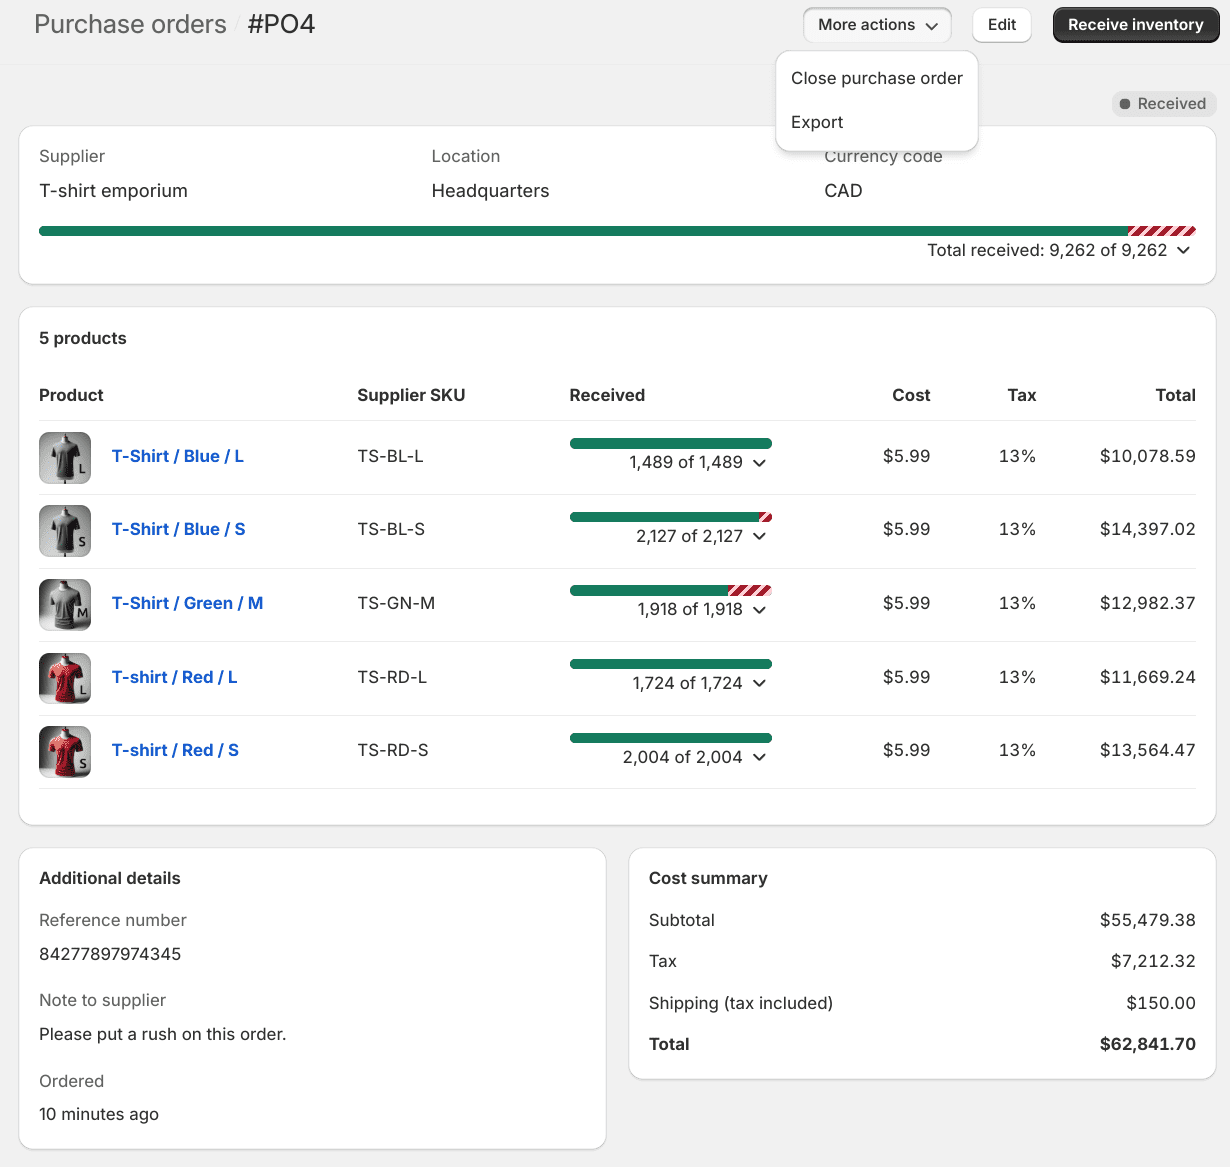
Purchase order states
Draft
The first state after saving a new purchase order, used to save work in progress.
Ordered
The state after marking a draft purchase order as ordered, but no inventory has been received.
Partial
When some inventory has been received but not all.
Received
When all of the inventory has been received.
Closed
A purchase order that has been explicitly marked as closed for any reason.